
Following up to our previous post about Client Groups, this week we’re discussing the array of options available to customize the appraisal-ordering experience for your VMP Client Portal users. We’re also focusing on the powerful automations that control when an order’s status and documents are synchronized with the client’s and vendor’s orders, your Compliance Certificate, plus tons of other automated settings.
In fact, there are so many possible automations that it’s easy to get lost. But as the name of our blog suggests, we sort of “geek out” about these cool features, so we’d like to help you use them to make your workflow in Mercury Network as delightful as possible (and reduce turn times in the process).
Support Center Walkthrough
VMP Client Portal
We talk about it a lot, but what is it, exactly? The VMP Client Portal is a part of your Mercury Network platform where “clients” can log in to place and manage appraisal orders. Admittedly, the word “clients” can cause confusion here. In this case, a client is a user who you’ve created in the Clients view in Mercury Network—frequently, this is loan officers, sales team members, or anyone else who places appraisal orders but doesn’t need admin, reporting, QC or other functions.
So, when we talk about settings for your VMP Client Portal, we’re talking about the settings that control the experience those “clients” will have when they log in to the portal to place an order. This includes several items:
Available products and their fees
What fields appear on the client’s order form (and which of those are required)
Which order statuses are visible (synced) to the client and the assigned vendor as the order progresses
The content of the Compliance Certificate attached to each order
Order assignment to AMCs and/or appraisers
Payment methods
Much MUCH more!
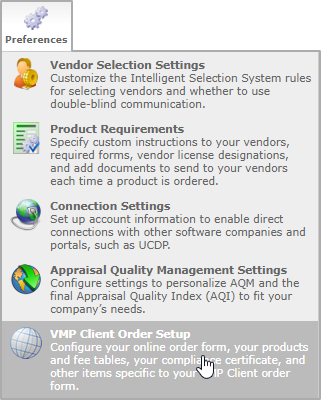
If some of this sounds familiar, it’s because many of the settings in Preferences -> VMP Client Order Setup are also found in each Client Group. Since you have the ability to control most of these settings for each Client Group, you have granular control over what each Client sees when they log in to your portal. So, generally speaking, the settings in Preferences -> VMP Client Order Setup can be thought of as “global” settings, and your settings in each Client Group will take precedence over these global settings.
However, there are some settings here that will apply to all orders placed via your client portal…
Support Center Walkthrough
Configure Order Form

Some of these items are configurable per Client Group, such as payment methods. However, several settings here will affect the order form for all your Client users.
For instance, the section titled Require Credit Card Payments for Clients lets you configure these requirements for each client, or for all clients and even all new clients that you create going forward.
In addition, the options to Show or Require fields on the order form and any custom labels you create will apply across all clients who use your client portal.
Support Center Walkthrough
Configure Status Mapping

The settings in Status Mapping will apply to all orders placed via the VMP Client Portal. In this area, you can control which order statuses are synchronized to the VMP client who placed the order and to the vendor who is assigned to the order. You can also control whether the client and the vendor can see each other’s comments on the order, and which order documents are available to each of them.
Support Center Walkthrough
Compliance Certificate

This is another setting which applies to every single order placed via your client portal. This automatic Compliance Certificate is customizable so you can add your own content while including salient fields from the order to which it’s attached. You can also set it up to prompt the user for missing information, include your company’s contact info, and make sure it’s auto-attached to every order upon completion.
Support Center Walkthrough